Scroll To Top

Add Icons, Lines and Shapes

You can easily add lines to map for walking or driving routes, and customize the icons.

Stylize the map pins

You can give all pins in a layer the same color and icon by choosing "uniform style". Then click the paint can icon and select color and icon from the list. Or you can choose “individual styles”in the popup, then proceed to mark each pin with its own color and icon. Uniform is the preferred shortcut for a layer, which quickly distinguishes its content from other layers. As mentioned earlier, it’s useful to have layers with specific themes, like restaurants, shops, hotels, or historic sites, then mark them accordingly.

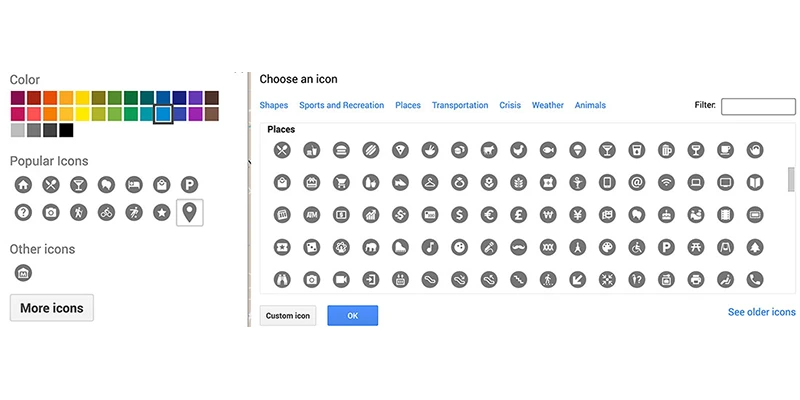
A blue teardrop shape is the default icon applied to a place automatically, but you can select from many other offered icons. There is a wide variety of icons styles and colors included in GMM which are helpful to match those themes -- a shopping purse, bed, camera, walking stick figure, wine glass, knife and fork, etc. You can expand the given menu by clicking "more" which opens up hundreds more graphics, or create your own. That is where choosing uniform style for the layer is functional, because you can select one type of icon which is automatically used on all places in the layer. Example are my map of Glasgow or Manchester.

If you want to change the sequence of places in a layer you need to choose the format as “individual styles” then move the item, and change the format back to “uniform style” if desired.

Edit contents of each place

When you click a place in the sidebar a window opens for that pin, enabling editing. When you click the item a small pop-up window for it opens on the map offering several options along the lower edge. Most useful are the paint bucket, pencil and camera, (or garbage if you want to delete it).

Places can include description that is revealed when pin is clicked.

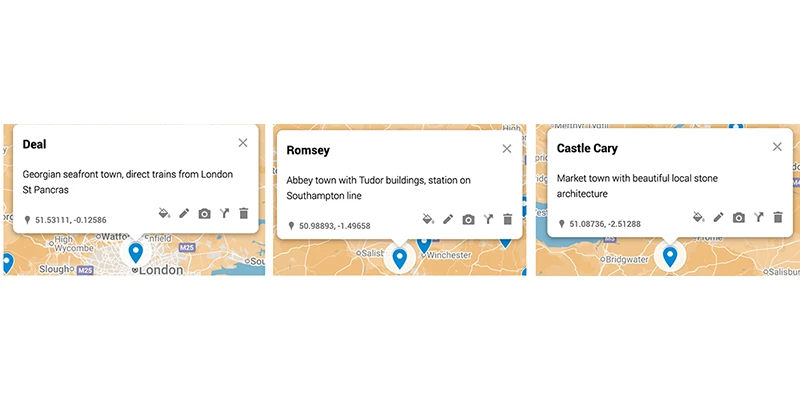
You can add description, links, photos and videos to the item. These will all be displayed later when you are using the map and want to know more about a sight you have arrived at. This makes the map a robust digital guidebook organized with a table of contents, providing instant access to full information about each topic. If you add no information to each of your pins you have missed a golden opportunity for a more rewarding travel experience.

Add description to item

This is extremely helpful and easy to do, based on the research you have already completed.
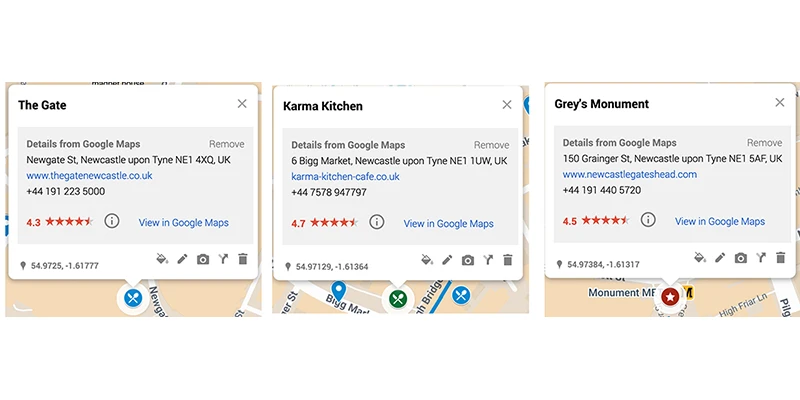
 As mentioned elsewhere, this is an essential step that will explain what you are looking at when you arrive at a place and why you listed the item. To find some text to add refer to the research you have been compiling for each place, copy relevant text and paste it into the text window of that item.

Add links

Many places have websites that can be quite useful, with opening hours, descriptions, photos, etc. You can add these links manually in the text description window, or many times the link will appear automatically when you first create the pin for that place.

Add photo or video to map

Click the camera icon and drag photo from your computer into the window that opens.
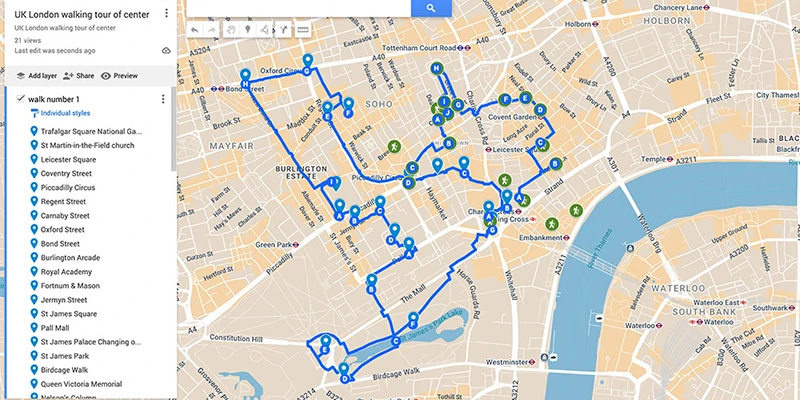
 You can also use the menu along top of that pop-up window to choose a photo from your library, or add a YouTube video and other options.

Walking routes

First, create and organize pins into the walking sequence for the various stops you want along your route. Rearrange places for this desired sequence by dragging them in the left panel up or down. There is a limitation of 20 places on a single walking line. If you need more places, create a new layer and start another line from the end of the first route.

Click the "draw a line" icon underneath the search bar. Choose "Add walking route" (or driving route if you prefer).

This will open up a new Untitled Layer. Add title by clicking on "untitled layer" and saving.

This open up two panels A, with your starting point and B.

Select Panel A and click on the map the pin of your starting point.

Select the B panel and click on your next route point, or type its name in the box. (If that takes you to the wrong place delete it by clicking the X in the panel and try again.)

The route line will automatically generate between the two points.

Click "Add Destination".

Continue in the same way adding more points to your route line. You can add multiple stops (A → B → C → D, etc.).

Fine-tune your route by selecting and deleting any of the route points. Or move the line by clicking and dragging any point on the route (although that can get messy).

You can delete entire layer if it is not working out well, and start over.

Walking route example:

Add other lines

You can draw lines on the map, for example to outline an important sight, or neighborhood. Select a layer containing places (not a direction layer). Click the "draw a line" icon underneath the search bar. Choose "Add line or shape" (to draw custom paths or boundaries)

To Draw Your Line: Click to add the starting point on the map. Click to add each point along the path. Double-click to finish the line. It is better to not connect the end points of the shape into an enclosed space, because that makes it more vulnerable to shifting around later when you are clicking or moving items. Just use the line to mostly enclose a place but leave it open-ended.

A box will pop up—give your line a name and description.

A layer can have 2,000 lines, shapes or places, while a map can have up to 10,000 lines, shapes, or places.

Introduction

Research

Organize & Format

Make Map

Icons & Lines

next up:

Using Map